TL;DR:
- The "Big 5" print essentials are CMYK, 300 DPI, bleed, fonts, and PDF output, causing 90% of errors.
- Automating checks at upload ensures higher accuracy, faster processing, and reduces costly reprints.
- Enforcing concise checklists and assigning ownership improves adherence and prevents oversight under deadlines.
Skipping even one step in your print production checklist can mean a full reprint, an angry client, and hours of wasted work. The stakes are real: 90% of print errors trace back to just five overlooked file requirements. Whether you run a busy print shop or freelance as a graphic designer, a reliable checklist is your first line of defense. This article gives you a proven framework covering the critical criteria, a step-by-step process, a comparison of manual versus automated approaches, and advanced expert checks so you can produce flawless print-ready files every time.
Table of Contents
- Critical criteria for a flawless print production checklist
- Step-by-step print production checklist and best practices
- Comparison: Manual vs automated print production checklists
- Advanced checks: Going beyond the basics for perfect results
- Perspective: The real challenge — checklists only work if they're enforced
- Ready to automate your print production checklist?
- Frequently asked questions
Key Takeaways
| Point | Details |
|---|---|
| Big 5 essentials | Focusing on CMYK, resolution, bleed, fonts, and PDF file type prevents most print errors. |
| Automate for accuracy | Using automated tools can catch 90 percent of mistakes instantly and consistently. |
| Go beyond basics | Expert-level checks like flattening transparency and PDF/X validation ensure flawless output. |
| Checklists need enforcement | A checklist only works if everyone on your team truly uses it in every job. |
Critical criteria for a flawless print production checklist
Having previewed the importance of checklists, let's dig into what absolutely must be included in yours. Not every file issue is equal. Some errors are cosmetic. Others will stop a job cold and cost you real money. Knowing which checks matter most is where every solid checklist starts.
The industry calls them the "Big 5" for good reason. These five non-negotiables account for the overwhelming majority of print failures:
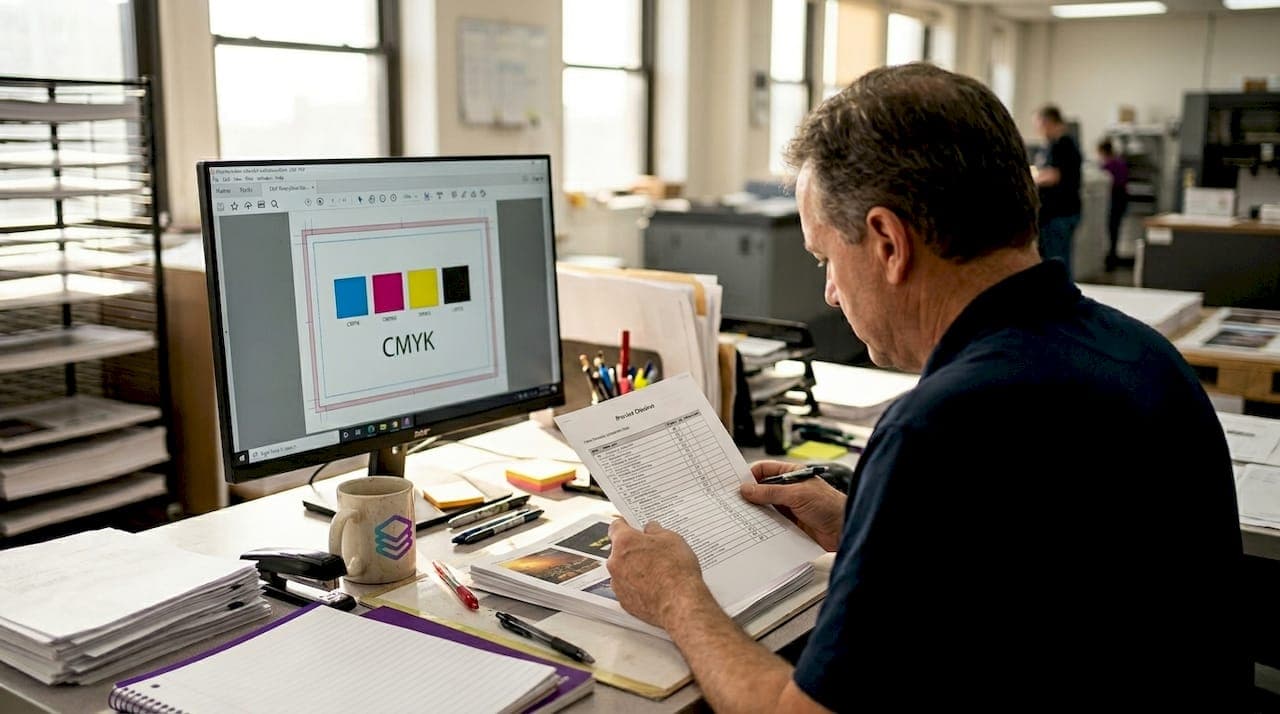
- CMYK color mode — All print files must use CMYK, not RGB. RGB is for screens. Sending an RGB file to press produces dull, unexpected colors.
- 300 DPI resolution — Anything below 300 DPI (dots per inch) prints blurry. Always check resolution before export, not after.
- Bleed — Bleed is the extra image area (typically 0.125 inches) that extends beyond the trim edge. Without it, you get white borders on cut edges.
- Fonts embedded or outlined — Missing fonts cause text reflow or substitution. Embed all fonts or convert them to outlines before sending files.
- PDF print output — Save files as print-optimized PDFs, not screen PDFs. The settings are different and the output quality reflects it.
"The Big 5 non-negotiables, CMYK, 300DPI, bleed, fonts, and PDF print output, cause 90% of issues. Automate to catch them at upload."
Why does automating these checks at upload matter so much? Because catching an error before production starts costs almost nothing. Catching it after a job runs costs everything. Automation removes the human variable from the most critical steps, so nothing slips through under deadline pressure.
Review your output specifications before building your template library. Setting project templates with these five defaults baked in means every new file starts compliant, not just the ones you remember to check.
Pro Tip: Build a master template in your design software with CMYK color mode, 300 DPI, and bleed guides already set. Every project starts from that template. You eliminate the most common print mistakes before you even start designing.

Step-by-step print production checklist and best practices
Now that you know what belongs in your checklist, here's how to systematically check each item in your workflow. Order matters. Running checks in sequence prevents you from validating a step that a later change will undo.
- Confirm color mode is CMYK — Check this first. Converting from RGB late in the process shifts colors. Do it at the start.
- Verify resolution at 300 DPI or higher — Use your software's document setup panel. Check linked images separately; they can be lower resolution than the document.
- Set and confirm bleed — Standard bleed is 0.125 inches on all sides. For large-format jobs, bleed requirements increase. Always check the printer's spec sheet.
- Embed or outline all fonts — Run a preflight check in your PDF export dialog. Any missing font will trigger a warning.
- Check file format — Save as PDF/X for commercial print. For screen printing or DTF workflows, confirm which formats your output provider accepts.
- Validate PDF/X compliance — PDF/X is a subset of the PDF standard designed for print. It restricts features that cause output problems. Always validate PDF/X compliance before submitting.
- Flatten transparency — Complex vector artwork with transparency layers can cause missing elements or rendering artifacts at the RIP (raster image processor) stage. Flatten before final export.
- Check black ink settings — Standard black uses 100% K ink only. Rich black (typically C60 M40 Y40 K100) is for large solid areas. Using rich black on small text causes misregistration and blurry edges.
Common mistakes at each step:
- Forgetting to check linked image resolution separately from the document DPI
- Applying bleed to the design but not setting it in the document's export dialog
- Outlining fonts in one artboard but missing a secondary page
- Exporting as PDF/X-1a when the printer requires PDF/X-4, or vice versa
Review a thorough design file checklist to cross-reference your own process. For teams, building a step-by-step workflow document keeps everyone aligned. For packaging and product print jobs, CPG packaging print readiness standards add another layer of compliance to consider.
Pro Tip: Save your completed checklist as a reusable project template. Include a simple sign-off field for each item. It takes 90 seconds and creates accountability across your team.
Comparison: Manual vs automated print production checklists
Once your checklist is set, the next question is how you enforce it — manually, or with automation? Both approaches have a place. But the data makes a strong case for automating wherever possible.
| Factor | Manual checklist | Automated checklist |
|---|---|---|
| Error detection rate | Variable, depends on reviewer | Up to 90% caught at upload |
| Time per file | 10 to 30 minutes | Under 60 seconds |
| Consistency | Drops under deadline pressure | Consistent every time |
| Cost of missed errors | High, reprints and delays | Low, caught before production |
| Scalability | Limited by team size | Scales with volume |
| Learning curve | Low for experienced staff | Minimal with modern tools |
The numbers are clear. Manual review works when volume is low, stakes are moderate, and your team is experienced. But it breaks down fast under real-world conditions.
Automation is essential when:
- You process more than 10 to 15 files per day
- Files come from multiple designers with varying skill levels
- You handle AI-generated artwork that may not follow standard print conventions
- Turnaround time is tight and there's no room for a second review pass
Manual review is still acceptable when:
- You're doing a final creative review for brand alignment
- The job involves unusual specifications that automation tools haven't been configured for
- You're reviewing a single high-value file with a dedicated proofing session
Integrating a solid design validation process into your intake workflow is the most efficient way to reduce reprints. Pairing that with tools that optimize your print workflow turns a reactive process into a proactive one.
Advanced checks: Going beyond the basics for perfect results
With core checklist steps covered, focus now on advanced measures that sharply reduce reprints and errors in complex jobs. These checks are where experienced print professionals separate themselves from the rest.
"Expert nuance: Differentiate standard black (100K) vs rich black; flatten transparency; validate PDF/X compliance for standards."
Advanced checks to add to your workflow:
- Spot color verification — Confirm all Pantone or spot colors are correctly named and not accidentally converted to process CMYK. A misnamed spot color will print as a CMYK mix instead of the intended ink.
- Overprint settings — Check that black text is set to overprint, not knock out. Knockout black on small text over a colored background creates misregistration gaps.
- Image color profiles — Embedded ICC profiles that don't match the output profile cause color shifts. Strip or convert profiles to match your press profile.
- Ink density limits — Total ink coverage above 300% on coated stock or 260% on uncoated stock causes drying problems and smearing. Run an ink density check on rich color areas.
- Trapping settings — For multi-color jobs, confirm trapping is applied correctly to prevent gaps between abutting color areas.
| Advanced error | Potential impact |
|---|---|
| Misnamed spot color | Prints as CMYK mix, color mismatch |
| Incorrect overprint setting | Misregistration gaps on text |
| Wrong ICC profile | Unexpected color shifts on press |
| Ink density over limit | Smearing, drying failures |
| Missing trapping | Visible gaps between color areas |
These checks are especially critical for screen printing, where each color is a separate layer, and for DTF (direct-to-film) printing, where color accuracy directly affects transfer quality. Review the full output standards guide for a complete reference. Understanding the role of design files in multi-step production workflows helps you see where each advanced check fits.
Perspective: The real challenge — checklists only work if they're enforced
Here's the part most articles skip. A checklist is only as good as the culture around it. We've seen shops with beautifully designed 20-point checklists that nobody follows when a deadline hits. That's not a checklist problem. That's an enforcement problem.
The counterintuitive fix is to make your checklist shorter, not longer. Automate the five to eight checks that get skipped most often under pressure. Leave the manual review for judgment calls that actually need a human eye.
Assign checklist ownership to a non-technical team member for routine jobs. When a designer is also the checker, confirmation bias creeps in. A fresh set of eyes, even from someone without deep technical knowledge, catches things the original designer misses.
For high-stakes jobs, require a double sign-off. Two people confirm the file before it goes to press. It sounds slow, but it's faster than a reprint. Building efficient print design workflows means designing your process so the checklist runs automatically, not as an afterthought.
Ready to automate your print production checklist?
With the stakes and solutions laid out, here's how you can put all this into practice instantly. A checklist framework is only valuable when it's built into your actual production process, not sitting in a document nobody opens.
LayerPrep takes the checklist from theory to practice. It automatically validates DPI, checks bleed, separates colors, and matches Pantone shades with 70 to 95% accuracy, all in an average of 30 seconds. It accepts PNG, JPG, PDF, and SVG files up to 50MB, including AI-generated artwork from Midjourney or ChatGPT. Whether you run a solo design practice or a full print shop, LayerPrep gives you automated checklist enforcement built directly into your upload workflow. No manual steps. No missed items. Just print-ready files, fast.
Frequently asked questions
What is the 'Big 5' in a print production checklist?
The Big 5 covers CMYK color mode, 300 DPI resolution, bleed, font management, and PDF print output. These five items cause 90% of issues when overlooked and should be the first checks in any print production workflow.
Why is PDF/X compliance important for print production?
PDF/X ensures your file meets print industry standards, preventing unexpected color shifts or format errors during output. Validating PDF/X compliance before submission is a non-negotiable step for commercial print jobs.
How does automation improve checklist reliability?
Automation catches up to 90% of checklist issues instantly at upload, eliminating the inconsistency of manual review under deadline pressure and reducing costly reprints.
When should you flatten transparency in your print files?
Flatten transparency before saving as PDF to prevent missing elements or rendering artifacts, especially in files with complex vector artwork or layered effects. Flattening transparency is a critical pre-export step for any job going to commercial press.
Recommended
- Avoid common print design mistakes for flawless prints
- Streamline print production: A step-by-step workflow guide
- Optimize print workflow: faster, error-free production 2026
- Essential print output specifications for flawless file prep
- Design vs Print: Why Stunning Files Fail in Production – BcardsCreation
- Najpogostejše napake pri tiskanju in kako jih preprečiti