
You have spent hours perfecting a design, only to discover critical errors after the print job is complete. Color mismatches, missing bleeds, and resolution issues turn what should be a smooth production run into a costly nightmare. For print shop owners and graphic designers, these preventable mistakes waste time, materials, and client trust. The good news? A streamlined design validation process powered by AI tools can catch errors before they reach the press, ensuring flawless prints every time. This guide walks you through practical strategies to validate designs efficiently, reduce rework, and deliver print-ready files with confidence.
Table of Contents
- Key takeaways
- Understanding the design validation challenge in print
- Preparing your workflow: tools and checklist essentials
- Executing the step-by-step design validation process
- Troubleshooting common validation mistakes and verifying print readiness
- Enhance your print validation with LayerPrep
- FAQ
Key Takeaways
| Point | Details |
|---|---|
| Early AI validation | Run AI validation immediately after finishing the design to prevent compounding errors and save revision time. |
| Validation checklist | A clear validation checklist standardizes the workflow by ensuring color, resolution, bleeds, fonts, and file formats are checked at each stage. |
| Color accuracy | Confirm color profiles and Pantone matches to avoid color mismatches on press. |
| Bleed and resolution | Verify bleed margins and resolution thresholds to prevent white borders and pixelation. |
| Workflow integration | Integrating validation tools into the design to production workflow reduces rework and speeds production. |
Understanding the design validation challenge in print
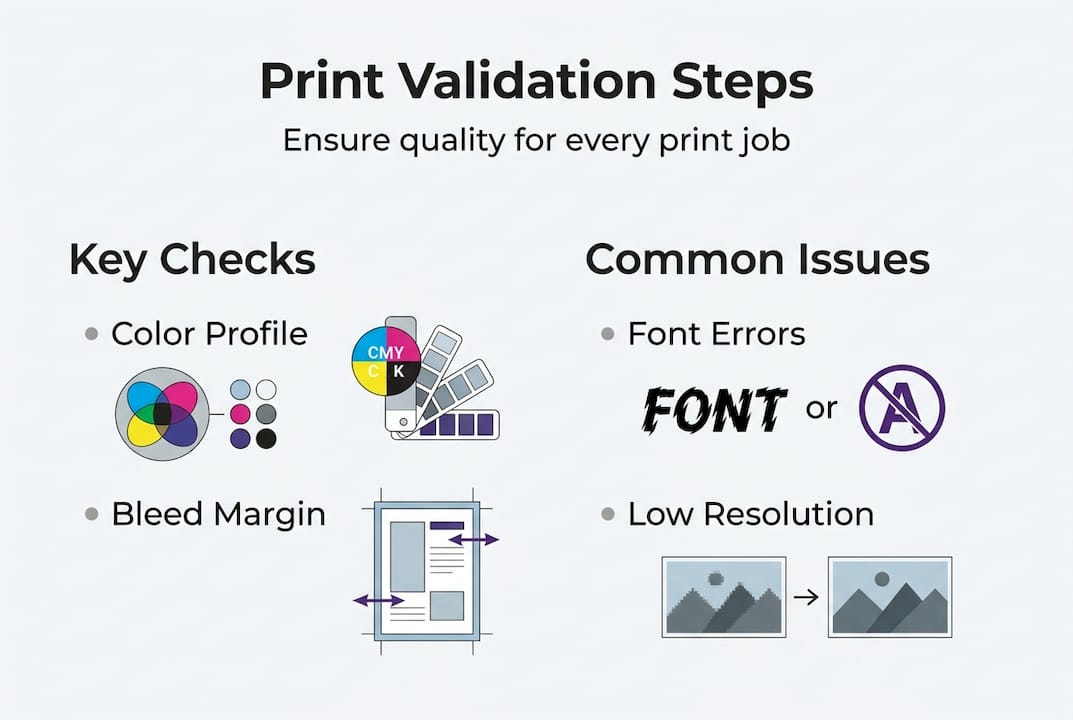
Print production demands precision. A single overlooked detail can derail an entire job, leading to wasted materials, missed deadlines, and frustrated clients. The challenges are numerous: incorrect color profiles produce unexpected hues, low-resolution images appear pixelated, missing bleeds create unwanted white borders, and incompatible file formats cause production delays. These issues often surface too late, after files have been sent to production.
Manual checking requires meticulous attention to detail and consumes valuable time. Even experienced designers occasionally miss subtle problems when reviewing complex files. Human error becomes inevitable when juggling multiple projects under tight deadlines. Color values that look correct on screen may print differently due to profile mismatches. Font embedding issues emerge only when files are opened on different systems. Bleed settings that seem adequate prove insufficient during trimming.
Avoid common print design mistakes by implementing systematic validation early in your workflow. AI-powered tools transform this process by automating error detection, scanning files for issues in seconds rather than hours. These systems check resolution, validate color profiles, verify bleed specifications, and flag font problems before files reach production. Automated validation catches issues human eyes might miss, especially when dealing with complex gradients, transparency effects, or layered compositions.
Pro Tip: Run AI validation checks immediately after completing your initial design. Early detection prevents compounding errors and saves hours of revision work later.
Consider the typical print shop workflow. Designers create files, send them for approval, make revisions, and finally prepare for production. Each stage introduces opportunities for errors to creep in. A client-requested color change might shift values outside the printable gamut. A last-minute text edit could introduce non-embedded fonts. Resizing artwork might reduce resolution below acceptable thresholds. Without systematic validation, these problems remain hidden until the press operator discovers them, halting production and requiring urgent fixes.
"Prevention is better than correction. Validating designs before production saves money, time, and relationships with clients who expect flawless results."
The cost of print errors extends beyond materials. Rush reprint fees, delayed delivery to end customers, and damaged professional reputation all stem from inadequate validation. Print shops that implement robust checking processes report fewer customer complaints and higher profit margins. The investment in validation tools and procedures pays for itself through reduced waste and improved efficiency.
Preparing your workflow: tools and checklist essentials
Successful validation begins with proper preparation. You need the right tools and a structured approach to catch every potential issue. AI-powered platforms like LayerPrep automate color separation, Pantone matching, DPI validation, and bleed checking. Traditional tools such as Adobe Acrobat's preflight profiles, color management software, and resolution analyzers complement AI systems. Together, they create a comprehensive validation framework.
Your design file checklist should cover these critical areas:
- Resolution verification: Ensure all raster elements meet minimum DPI requirements for the intended print method
- Bleed specifications: Confirm adequate bleed extends beyond trim lines on all sides
- Color profile accuracy: Validate CMYK, Pantone, or spot color definitions match production requirements
- Font handling: Check that all fonts are embedded or converted to outlines
- File format compliance: Verify files are saved in print-ready formats with proper compression settings
- Layer organization: Ensure proper layer structure for separation and production efficiency
| Validation Focus | Primary Tools | Common Issues Addressed |
|---|---|---|
| Color accuracy | AI color matching, spectrophotometer readings | Pantone mismatches, RGB to CMYK conversion errors |
| Resolution | DPI analyzers, image quality scanners | Pixelation, insufficient detail for print size |
| Bleed and trim | Measurement tools, automated checkers | White borders, trimmed content |
| Fonts | Font management software, embedding validators | Missing characters, substituted typefaces |
| File structure | Preflight profiles, layer inspectors | Flattening issues, transparency problems |
AI enhances checklist efficiency by performing multiple checks simultaneously. While manual validation requires reviewing each element sequentially, AI systems scan entire files in seconds, flagging every issue at once. This parallel processing dramatically reduces validation time without sacrificing thoroughness. You receive a comprehensive report highlighting problems by priority, allowing you to address critical issues first.
Pro Tip: Create custom checklist templates for different print methods. Screen printing, DTF, and offset lithography have unique requirements, so tailored checklists prevent confusion and ensure method-specific validation.
Organize your validation workflow into clear stages. First, gather all design files and client specifications. Second, run automated AI checks to identify obvious problems. Third, perform manual reviews of flagged issues and subjective elements like composition and alignment. Fourth, generate proofs for client approval. Fifth, conduct final verification before sending to production. This staged approach ensures nothing slips through while maintaining efficiency.

Document your validation process. Written procedures help train new team members, ensure consistency across projects, and provide accountability when issues arise. Include screenshots, tolerance ranges, and decision criteria in your documentation. Update procedures regularly as tools evolve and you discover new best practices.
Executing the step-by-step design validation process
Implementing a systematic validation routine transforms chaotic checking into a reliable, repeatable process. Follow these numbered steps to ensure thorough validation every time:
- Import design files into your validation platform, ensuring you have the original working files with layers intact rather than flattened exports.
- Run automated AI analysis to detect resolution issues, color profile mismatches, missing bleeds, and font problems across all elements simultaneously.
- Review the AI-generated report, prioritizing critical errors that would prevent printing over minor aesthetic suggestions.
- Verify color accuracy by comparing AI Pantone matches against client specifications, checking that spot colors fall within acceptable tolerance ranges.
- Inspect bleed settings manually, confirming that important design elements stay within safe zones while bleeds extend adequately beyond trim lines.
- Check font embedding or outlining status, ensuring no live text remains that could cause substitution issues on production systems.
- Validate resolution for all raster elements at final print size, confirming DPI meets or exceeds minimum requirements for the chosen print method.
- Generate a soft proof for client review, annotating any changes made during validation and requesting confirmation before proceeding.
- Conduct final verification after client approval, running a complete validation cycle again to catch any issues introduced during revisions.
- Export print-ready files in the correct format with proper color profiles embedded, organizing layers as required by your production workflow.
| Validation Approach | Speed | Accuracy | Cost Efficiency |
|---|---|---|---|
| Manual checking | Slow (30-60 min per file) | 85-90% (subject to human error) | Low (high labor costs) |
| AI-driven validation | Fast (30 seconds per file) | 95-98% (consistent detection) | High (minimal labor required) |
Streamline digital artwork print process by integrating AI checks early in your workflow rather than treating validation as a final step. When designers run quick validations during creation, they catch and fix issues immediately while context is fresh. This prevents the frustrating cycle of discovering problems only after considering a design complete.
Color profile verification deserves special attention. Ensure your design uses the correct color space for your print method. CMYK for process printing, Pantone spot colors for brand-critical elements, and proper ICC profiles for specialized applications. AI tools excel at detecting subtle color shifts that human eyes might miss on screen, comparing values against extensive color libraries to flag potential mismatches.
Bleed checking seems straightforward but requires careful attention. Standard bleeds extend 0.125 inches beyond trim lines, but some print methods or paper stocks require more. Verify that no critical elements like text or logos fall within the trim zone where cutting variations might affect them. AI validators measure these distances precisely, eliminating guesswork.
Font issues cause production delays more often than any other problem. Even when fonts appear correct on your system, missing font files on production computers trigger substitutions that alter layouts. Converting text to outlines eliminates this risk but prevents future text editing. Choose your approach based on whether files might need revisions after validation.
Pro Tip: Integrate AI validation into your design software through plugins or APIs. Real-time checking as you work catches issues immediately, preventing the accumulation of errors that require extensive fixes later.
Troubleshooting common validation mistakes and verifying print readiness
Even with systematic validation, certain mistakes occur repeatedly. Understanding these pitfalls helps you avoid them and respond effectively when they surface. Wrong color profiles top the list of common errors. Designers working in RGB accidentally submit files without converting to CMYK, resulting in dramatic color shifts during printing. Some projects require specific Pantone colors for brand consistency, but designers substitute similar CMYK builds that print noticeably different.
Missing or insufficient bleeds create the second most frequent problem. Designs that look perfect on screen produce white borders after trimming because artwork stops exactly at the trim line. Background colors must extend beyond trim boundaries to account for slight cutting variations. Full-bleed designs require extra attention, ensuring backgrounds continue seamlessly past all edges.
Font issues manifest in several ways. Non-embedded fonts appear as default substitutions, destroying carefully crafted typography. Outlined text prevents future editing but ensures consistent rendering. Some designers forget to outline fonts in linked graphics or imported elements, causing problems even when main document fonts are handled correctly.
Troubleshooting steps for common validation failures:
- For color mismatches, verify the correct color profile is embedded and matches production specifications, then use AI tools to identify out-of-gamut colors requiring adjustment
- When bleeds are missing, extend background elements and full-bleed images 0.125 inches beyond trim lines on all sides, checking that no critical content falls within trim zones
- To fix font problems, outline all text or embed complete font families, then confirm the changes by opening files on a different computer system
- If resolution is insufficient, source higher-quality images or recreate raster elements as vectors when possible, avoiding simple upscaling that doesn't add real detail
- For file format issues, export using print-ready settings with appropriate compression, ensuring compatibility with production systems
AI detection catches issues proactively by scanning files against comprehensive rule sets derived from thousands of successful print jobs. These systems learn from past problems, continuously improving their ability to flag potential issues before they cause production delays. When AI identifies a problem, it typically suggests specific corrections rather than simply noting the error exists.
Print validation guide emphasizes quality assurance through multiple verification stages. After making corrections, run validation again to confirm fixes didn't introduce new problems. This iterative approach ensures comprehensive checking even as files evolve through revisions.
Verifying proof accuracy before production provides final confirmation. Generate a PDF proof with crop marks, color bars, and registration marks visible. Review this proof carefully, checking that all elements appear correctly positioned, colors look appropriate for the print method, and no unexpected artifacts or distortions are present. Share proofs with clients for approval, documenting their sign-off before proceeding.
Pro Tip: Maintain clear communication with clients about print specifications. Confirm color expectations, paper choices, and finishing requirements in writing before starting validation. Misunderstandings about specifications cause more problems than technical file errors.
"The best validation process combines automated AI checking with human judgment. Technology catches technical errors reliably, while experienced designers verify that the overall result meets creative and client expectations."
Document every validation cycle. Keep records showing what checks were performed, what issues were found, how they were corrected, and when client approval was received. This documentation protects you if questions arise later and helps identify patterns in recurring problems that might indicate process improvements needed.
Enhance your print validation with LayerPrep
Transforming your design validation workflow from manual checking to AI-powered efficiency changes everything. LayerPrep's platform automates the tedious aspects of print preparation while maintaining the precision your projects demand. The system handles color separation, Pantone matching at 70-95% accuracy, DPI validation, and bleed verification in roughly 30 seconds per file.
You upload designs in PNG, JPG, PDF, or SVG formats, and LayerPrep's AI analyzes every element against print-ready standards. Complex gradients, large files up to 50MB, and both AI-generated designs and traditional artwork all process seamlessly. The platform produces detailed output files with properly separated layers ready for screen printing, DTF, or other production methods. This automation eliminates hours of manual color separation work while reducing errors that cause costly reprints. LayerPrep automation tools integrate smoothly into existing workflows, whether you are an individual designer or managing a team. Subscription plans scale with your needs, providing the validation capacity required for your project volume. Start optimizing your print production today and experience the confidence that comes from knowing every file is truly print-ready before it reaches the press.
FAQ
How can AI tools improve the design validation process for print?
AI tools detect common file issues like resolution problems, color mismatches, and missing bleeds in seconds rather than the hours manual checking requires. They scan entire files simultaneously, flagging every potential issue with consistent accuracy that doesn't diminish with fatigue or distraction. This automation reduces human error while freeing designers to focus on creative work instead of technical verification.
What are the most critical elements to check in print design validation?
Color profiles must match your print method specifications exactly to ensure accurate color reproduction. Resolution needs to meet minimum DPI requirements for your print size and method, while bleeds must extend adequately beyond trim lines. Fonts should be embedded or outlined to prevent substitution issues, and file formats must comply with production system requirements. These five elements cause the majority of print production problems when overlooked.
How does a checklist help streamline print workflow validation?
A design file checklist ensures no critical validation step gets skipped, even during busy periods or when handling unfamiliar project types. It supports clear communication between designers and print production staff by establishing shared expectations and standards. Checklists speed up validations by providing a structured sequence to follow, reducing the mental effort required to remember every necessary check. This consistency reduces rework and improves overall print quality.
What common mistakes should I avoid during the design validation process?
Neglecting bleed settings causes white borders after trimming, while using incorrect color profiles produces unexpected color shifts that disappoint clients. Not embedding or outlining fonts leads to text substitutions that destroy your typography. Other frequent mistakes include accepting low-resolution images that appear acceptable on screen but print poorly, overlooking transparency effects that flatten incorrectly, and failing to verify that spot colors match specified Pantone values. Learn from these common print design mistakes to avoid repeating them in your workflow.